Showing posts with label socks. Show all posts

Tuesday, March 31, 2020

Undyed sock blanks and Jellybean Dyeing

Back in 2013 I bought a bag of 10 x 100g undyed sock yarn. So I opened up the bag and was going to do some sock blanks and see if I could sell them. 10 is a lot. Then I got side tracked with jellybean dyeing.
I bought a $2 bag of jelly beans from Reject Shop. I already did the sock blanks, 2 ends, T10 on the KX. 80 sts, with a dropped stitch in the centre. and off I went to jellybean dye them.
For both I put down a towel and put a long strip of plastic wrap down to lay the blank on it. I wanted to do stripes. and on the other side I did random plonked on.
Don't use the natural coloured ones, The cheap ones are best.
First batch was a but underdone I squeezed out too much water and didn't sort out the colours first so I didn't realise that there was a dark pink and a red, so they got mixed up,
I started at the red end and used the towel to start the roll up all the way to the end. I didn't want the colours bleeding into the top, so there's layer of plastic all the way through. 
I microwaved for 4 mins on high and took it out straight away. Unwrapped and splashed the vinegar around, rinsed, 
washed and it came out with the colours not through all the layers. Here they are, all wrapped up, before and after.
The unwrapped first experiment


For the next one, I sorted out all the colours first, then cut all the jelly beans into two and put them cut side up, in stripes, both sides, just like the first one. I put the cut black ones right along both the edges. I also chopped up three or four pinks and sprinkled them on the dropped bit. I was pleased with that idea too.
I left the blank a lot wetter and pritzed the jelly beans with some more water before I wrapped them up, same as before.. I microwaved for 2 mins then turned it over. had a cup of coffee and did another 2 mins. I could have done 2 more I think, next time.
Here's the second batch halfway through, with a much better saturation of both ends and the unwrapped blank, after it's vinegar bath, followed by a eucalyptus wash.  
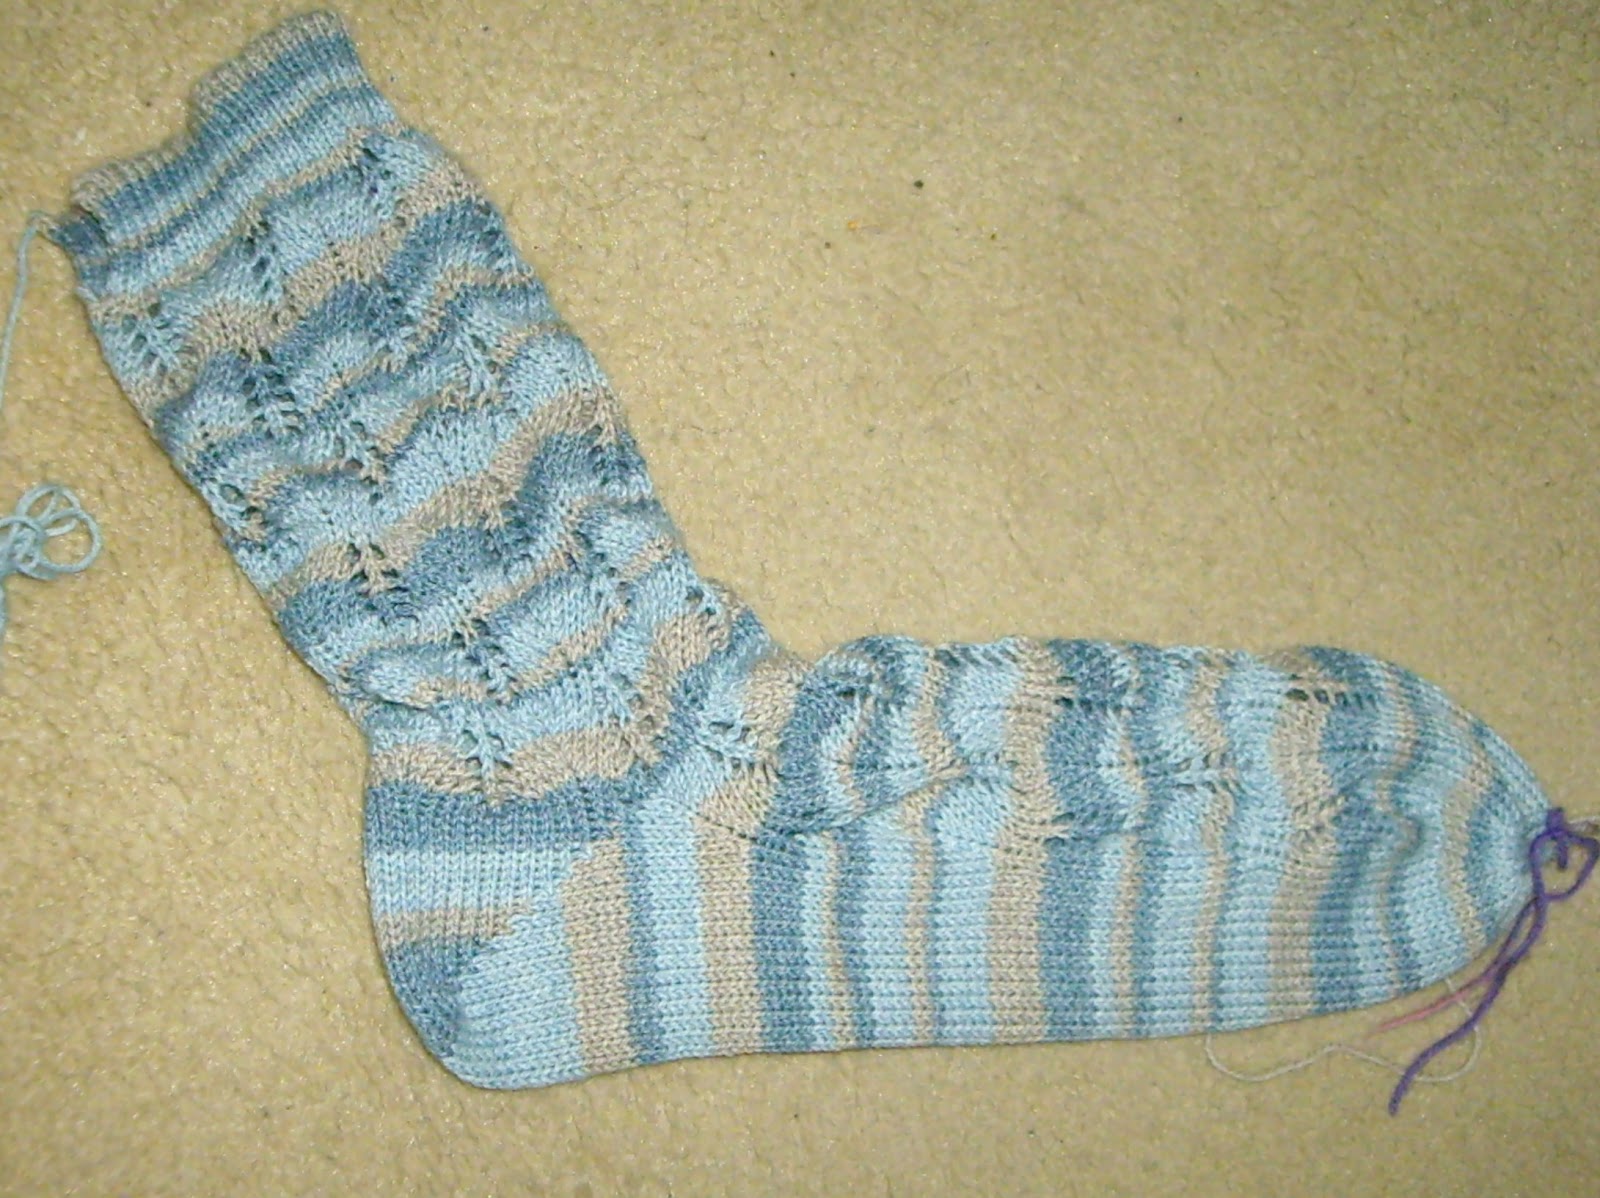
Over on Ravelry we have a whole thread on playing around with this in the Sock Blank Artists Group. And here's the second sock, and the tiny bit left over. And here's the second one, with the colours much more vivid. I like both.


Sunday, August 12, 2012

Hand Tooling Lace Socks on My Passap

Passaped Spring Forward Socks


I have wanted to make Spring Forward socks for the longest time. And I decided that I want to make them on the Passap machine as an experiment to see how difficult is really is.
 
Spring Forward lace sock one done
 
Tools of the trade, row counts on kindle
I put the row count and lace pattern in excel, then pasted it into Publisher, made it a whole page, saved it as a .pdf and sent it to my Kindle.

I also needed the yellow prongs and my favourite, most used tool, red hooky.


At a colour join. Put it through the feeder and hold it on the join,
then cast on, both socks will be the same
To get your socks to match, choose the colour match and put it on top of the eyelet and start your cast on.


I chose one of my new eyelets with the metal tip

I made sure I was using one of my new eyelets with the metal tip, I have two of them. I didn't want another broken tip.


I used pushers to identify the transfers

I used the pushers to mark the correct pattern.

I put the two parts of the chart - where the ssk/2tog fall - both those pushers are put back in the rails, so all I had to do was nudge up the two pushers next to them, which made it easy to see where the two needles were. I don't have a better way to describe it, but it was very quick and easy.

I also put the pusher back into the rails that corresponded to the single stitch between the two yos. So I was able to check that I had been following the chart correctly.


there is no way to check


There is no way to check how the pattern is forming on a Passap, whether I had it correct, so after I did one complete pattern, I took it off on deckers to check it.

If I dropped a stitch and couldn't pick it up straight away, it was quicker to take it off, fix it and put it back. This was mainly on the first half of the first sock. I took more care from then on.


Take off on deckers to check the pattern


Progressing well


And here it is under the machine - I thought it was an interesting picture! sorry!

And they are finished:


And here they are, all finished

All done!


My old eyelets are on the left. The plastic around the tip breaks
For Raymonde - the old eyelets - the tip breaks off through age. On my lace socks, I didn't want to pick up half a lace sock off the machine - it was tricky enough doing it without equipment failure!


Wednesday, May 23, 2012

The scales didn't lie.


As most know, I'm halfway through my 2012 "cold sheep". Meaning I have made a commitment to not buy any yarn, no matter how much of a bargain it is, this year. So I'm using the stash I have, not only did I use up every little bit of 1 x 100g Chubby Sock wool, but also finished off the left overs from the last Chubby sock I made:

Cadence Socks with left over toe and 2m of it leftover.

Now onto my last FO (Rav speak for Finished Object). A lovely pattern, Cadence is one of those rare patterns that I can't adapt to be bigger. I have some beautiful 5ply, no longer available, theknittery Chubby Sock Wool in Smoke and I can knit it on 3.00mm and use the 64sts lacy pattern. Almost a perfect plan..

Stretch Cast on
So I made one, using a nice stretch cast on, I found here, which worked well on either a bigger needle or both together, it did turn out well. So back to .... I made the first one, then started on the second, then halfway through I realised I didn't do the cast on properly and I wouldn't be able to put it on. Then I saw how little I had left and decided to get out the scales and weighed the finished sock and then remaining wool. Well, I wouldn't have enough. What to do? Either start over with another yarn? undo it and take out some rows above the heel in the first sock? or... I found some leftovers from the last socks I made out of TK Chubby, weighed it with the second sock wool and the combined weight was just a bit more than the first sock.

So.. I decided I could live with the toe in the different colour, same wool stock, not undo the first sock to have roughly the same amount of other coloured toes, it will be in my shoes. I didn't want a join further up the toe if I could possibly help it and the colour will fade a bit after a couple of washes.

Anyways, I did have enough to make it all the way to the end, with just the toe to do. And am pleased to know the scales don't lie. I did have enough combined wool to do the second sock - with about 2 metres left! So glad it wasn't the other way!

Saturday, July 2, 2011

Loz's Slip Stitch Heel Flap Socks


Loz likes the heel flap socks like she hand knits and
was asking can she make them on her KX35o.

So, my bright idea for Lauren's socks are done. I thought. And this is what I came up with.

They could be made on any single bed machine - just adjust stitch count and rows.

The cast on numbers are 20-24, depending on how wide the sock. I did this pair on T4, however, I think T3, 3.1 would be better. A tighter knit is usually preferred. However the thicker socks? Best experiment and see what is preferred.

So.. Cast on and/or not do your cuff of choice. Maybe your cuff of choice is to pick up the stitches and knit the ribbing? Maybe drop back and latch up? Or mock rib? Hung hem? Pick one.

then roughly 30-40 rows to heel

RC000. Set the KX35o to Partial knitting on the left side (flip the side lever up). Do that on the SK860, but also flip the dial to Slip. (Apparently Punchcard No. 1 does it automatically - Doesn't help if you have neither of these machine, but if making these on a standard punchcard? Good, go for it).

Ok back to doing the slip stitch heel flap.

Starting on L10, bring EON up to hold (so only they knit) PLUS THE NEEDLE ON THE OTHER END.
Knit 2 rows.

Now starting on R10 bring up EON PLUS THE OTHER END NEEDLE.
Knit 2 rows.

Repeat these four rows for (say) 22 rows. (Always - BOTH ENDS NEEDLES WILL KNIT)

Turning the heel:

This bit is surprising tricky.

Identify one third of the needles in the centre.
It is MUCH easier if the end numbers are divisible by 2....
for 20 sts: 6/8/6
or 22 sts: 8/6/8 or 6/10/6
or 24 sts: 8/8/8.

Now what you are doing is knitting xxx stitches, k2tog, k1, turn. Sl 1, p xxx sts, p2tog, p1 turn - repeating until all stitches are knitted.

Starting with carriage on the right, identify your centre, and with your two prong tool, pick up the two stitches next to it and move them over 1 needle. (the handknitting equivalent of K2tog, K1.)
Either put the remaining needles on the left in hold, or slip them onto bobby pins etc.

Knit one row, bring the needle closest to the carriage out to hold. pick up the 2 stitches on the right and move them over one needle and remove the other stitches (exactly as you have done on the left). knit one row.

Now do this all the for the next couple of rows until all the stitches are back in work:

On the carriage side: bring the last needle knitted out to hold
on the opposite side: bring one new needle up into WP, put the first stitch hanging on the bobby pin onto the needle that was on hold last row and the second stitch onto the new needle.
(what you are doing is: Slip one, knit to last stitch held, knit it plus the next stitch together, knit 1, turn)

Picking up the stitches from the side of the heel flap. 22 rows = 11 sts to be picked up.
I tried picking up the bar - but on the thick yarn, the bump is better. However - after the first one, it's very, very difficult to prize the little blighter loose, so I ran a thin needle up them all and they went on beautifully.

Knit one row.

Do the same to the other side. It is a very big stretch, I made it almost to the end, but slipped a couple of bobby pins onto them, knit one row, then slipped them on and hand knitted them.
knit two rows very quickly - before it gets time to get cranky.

Now, doing the gusset. Fully fashioned is the norm.

Each end. Pick up needle 3, put on top of needle two and move both over one needle and return the end needles to RP.

Knit 2 rows.

Continue until you are back to your original stitch count.

This is a bit of a guess - do xx rows to your toe. Somewhere between 40-50 depending on length of foot and how many rows done in the toe.

But before you do them, identify the correct bar to collect on the way back by putting a marker - bobby pin, paperclip, scrap of yarn on the bar before you start your toes.

Short row toes:
If you have round shaped toes, then do short rows until 10 sts, about half the stitches remain.
If you have more pointed toes, then do short rows until 6 or 8 sts, roughly a third of the stitches remain.

Using the Sew-As-You-Go technique, continue knitting until you are at your cuff stage and match what you did when you began.

I've done step-by-step instructions into a PDF for her. I've popped it on Ravelry download, there are a lot more photos describing the technique.

Download Pattern


Tuesday, June 28, 2011

Loz Socks


I've been experimenting with heel flap style single bed socks for my daughter's KX350. Some call it slip stitch heel flap in machine knitting circles, or so I've been told.

You see... I had an idea. I've written it up for her to try...

If I've explained it properly, I'll finish it off and put up the PDF on Ravelry.

Sunday, June 5, 2011

Machine Dutch Heel


Sandy, on Ravelry, found a delightful pattern for machine knit Dutch heel socks. Well, you know me and socks - had to try them out, didn't I?


Very interesting construction. I really liked how they turned out. I haven't worn them yet, but the day is still young. I may just need to wear them today.


I followed the instructions as written, on the Passap, I've put all the std gauge machines away, so dropped the front bed and worked the rows on Miss Pinky.

I decided to put a little bit of padding to the mini flap rows.

My numbers are:
C/O72, T3.5, 2.2 IR ribbing 16R
T4.75, CX/CX 170R
*GX/BX 1.1, right arrow, 1 row, end pushers WP.
GX/N 1 row, bring outside pushers to WP*
Repeat * to * for 24 R
GX/N, Heel divide: 11/14/11 (follow original instructions) RC000
CX/CX T4.75 30R NO reset, change to T4.5, to 150R
Toes - Dec 1 sts all four edges on RC 150, 158, 164, 17o, 174, 178, 182, 186 then ev round till 8 sts remain.

Sunday, June 13, 2010

Yoko's First Sock


Well I've just made a sock on the SK860. I've made so many on the Passap. But. I have been given some 8ply (DK) wool - I think it's Cleckheaton Country 8ply - definitely a mill end/remnant from Wangaratta Mill. Looks a bit thick and I did a quick wrap around the only thing with inches I have - an old tape measure and was 10 wpi not 11, it will not be an easy knit on the Passap. So. Time to learn new things today.

first try:
Cuff:
Cast on 48 - T4/4. 16 rows, drop the ribber one click, then transferred to the ribber and knitted one row. I tried out using the garter bar on one side, and moving them on the next. I don't like using scrap knitting. Next time I'll take them off with the circ and put them back on again, though, the garter bar did work. It's just a bit big. If I think I'll make more, I'll invest in a set of decker combs from that fellow in Germany, they are by far the quickest. NEXT TRY: 48 is too wide (with this wool) so 40 or 44 will be better.
Leg:
Next onto the circular knitting.
Setting: T5/7 - 50R (next do 60) apparently the ribber is two numbers higher than the main bed and looking at the finished sock, it's pretty close. BUT. Oh My Goodness... there is a plastic thingy - a D something something, that you have to slide over the ribber needles before you knit the ribber row every time. EVERY TIME! Reminder to self: It's quicker than knitting by hand... and ... annoying.
Heel:
The short rows were easy enough, on the back/main bed. down to 8 and back worked out nicely. Dropping the ribber one click, changing the plate over and back, adding a weight to the heel, all easy.
Foot:
circ to 80Rows worked out well. measured 15cm/6", moved weights, no problems
Toe:
dec each end, each bed, next and every 4th row count (2nd row) to 12sts.

Take photo .. and before it gets too comfortable - undo the lot and remake with a few more rows before the heel and 4-8 less stitches.

Next one was great:
Cuff: CO 44, T3/3 16R, keep comb and weights on. Trans to ribber. reset. for ribber to knit 2 R T7, undo last quarter (11 sts).
drop bed about 2 clicks, move carriages to end, trans end quarters (11sts) to main bed with garter bar, making sure yarn thread is out of the way (wind it on the mast) Reset RC.

Leg: 69R COL,
Heel: drop ribber 1 click, change plates and settings for short rows down to 8 and back. Reset RC.

Foot: change plate and setting for circ, 80R

Toe: dec 1 sts each end, both beds every 2nd row (4RC) to 10 sts.

Graft toe, sew cuff.

Make another one.

Sunday, April 26, 2009

Socks and Cards Week

I decided next week that I needed to shut the lid on the computer and finish off the last of my sock orders. I've made 3 pairs of heel flap socks, one ankle version for me and two long knee length socks for Sim:

Now the knee socks are long - here's their amended pattern:

CO 80 FB for 2:2 industrial rib, starting with 11.11 to end, both beds.

Cuff:
T3, N/N, 100R, transfer front sts to back bed, both sts onto empty needle making 80 sts in all -
T4.5, GX/N, 2R, fold in half from centre sts - RC000

Legs:
T4.5 (throughout the rest of the sock), CX/CX, 150R, then dec 2nd sts from end in rows:
150, 160, 170, 190, 210, 230, 250, 270, 290, 310 to 60 sts. Rotate quarter turn before 350RC.

Heel flap: 30/30 split. RC 000
row 1: GX/BX right arrow, ev other pusher in working position, plus END PUSHERS always UP.
row 2: GX/N,
then: put end pushers up
Repeat these three actions to RC 48.

Turn Heel: GX/BX, use pushers to work 17sts, work 2 tog, 1, (19 total), next row work 6 (then 7, 8 etc to end) 2 tog, 1 till 18 sts remain. (I also put the needle/pusher closest to the lock DOWN - mimicking slip one). rotate quarter turn so middle heel is on the right.

Gusset: RC000
Pick up 24 each side, 96 sts in all, CX/CX, decrease on upper side every 4th rowcount and every 1oth rowcount on sole/heelturn side 15 sts from end on all beds. continue to 60sts

Foot: continue to RC 150

Toe: dec 2nd st from end on all beds (4sts in total) on RC 150, 158, 164, 170, 174, 178, 182, then every 2 rowcounts till 8 sts remain.

Graft toe and sew back cuff.

My Ankle socks are the same as the previous ones.

Next on the things to do this week are cards (As this is my knitting blog I've moved the cards over to my new card blog. I'm tidy minded!)

Tuesday, April 14, 2009

Monkey Spreadsheet for 80 sts Cast on

Monkey pattern in Knitty.com has a 64 sts cast on. Unfortunately, that's never going to fit me, so here is my 80 sts version (please click on the picture to see it clearly):

Wednesday, March 25, 2009

My Heel Flap Anke socks


This is one for the big foots amongst us.

The problem with heel flaps socks and me is getting the flap long enough to go over my heel which results in a lot of picked up stitches to get rid of before the instep.

While doing Sim's Heel Flap socks I found for some reason, dec every 2 row count (every round) didn't sit right. I experimented with keeping the every 4th row count (2 rounds) on the upper, and reducing the extras for her on the sole side. This looked much better and when she tried on the sock, I decided that the decreases could have been done evenly along the sole side.

Now for me. On went my best fitting heel flap socks, which I have worn a hole in and badly need replacing. Now for the pinch and pull and counted back that I could have finished 10 stitches back and calculated that if I reduced 2 sts on the upper ev 4th row (2 rounds) and 2 on the 8th row (4th round) I would have a lovely convergence in just the right place. P.E.R.F.E.C.T. My new best fitting cotton ankle socks.

To make mine:

Recommend you look at Stephanie's heel flap tutorial, as these are based on her technique.

CO 72 using industrial 2:2 rib, I join my ribs on the front bed and transfer them both to the empty needle on the back bed to obtain 72 live stitches.
T3; R16; 2:2 rib; N/N. Do transfer for circular, no reset, T4.5, CX/CX cont to RC 24. RC000.

Heel over 36 sts:
Row 1: T4.5 , GX/BX, right arrow, ev alt pusher in WP; 1st and 36th are always in WP.
Row 2: GX/N
Return pusher 1 and 36 to WP
Repeat these 3 actions to RC56. Remember to TAKE OFF ARROW.
Turn heel numbers: 26, 2tog, 1. Next row: 12, 2tog, 1.. etc.

Take off machine, as it's done in cotton blend, there are too many stitches to stretch across, unfortunately. Using 2.25mm pick up 30 sts along heel flaps and knit 3 rounds. You can put them back onto the machine at this point but even so, it's still a very very tight fit. I never solved the problem of the stitches loosening too much in the centre of the heel, as seen in the photo, not a too bad when the enlarged stitches are shared amongst it's neighbours. When I do them again, I'll knit the next decrease round by hand and the next making the row counter 10, then put back onto the machine to see if that solves that problem.

Gusset Decreases: dec on upper every 4th row (RC 8), moving the 18 sts one needle to the left. Starting on RC8, dec 2 sts on the sole side, again moving 18 sts on needle to the right = 4 sts decreased in total on every 8th RC. (seq: -4 RC8; -2 RC12; -4 RC16; -2 RC 20 and so on) until 72sts remain.

Rotate and continue to RC 170.

Toe: dec 4 sts on rows 170, 178, 184, 190, 196, 200, 204, 208, 212, 216 then ev 2 rc to 8 sts.

Sew cuff, kitchener toe.

Monday, March 23, 2009

Passap 75s Socks

Edit 6Apr09: I've put Passap 75s pattern on Ravelry. download here.

I'm experimenting with tuck lace socks for the top of Sim's socks. I thought she'd like a little bit of girly on her black socks. Similar to the ones by Knittaxa's Mein Muster, I based mine on Passap Pattern 75 from the first little purple book and is achieved by alternating CX and DX with 1 pusher in RP at regular intervals depending on stitch count. 4R CX/CX, Black; 4R DX/DX, Grey, ev 5th pusher in RP.

eg on my 60 st - every 5th stitch is tucked, on the 64st, every 4th.

One pair is all black, exactly the same pattern as the two colour ones, except I couldn't work out how to do her preferred heel flap. She loved the short row heel anyway!

Others in the little purple Passap book Vertical stripe:Pattern 91 Checks: Pattern 111 Using scraps in nice patterned stripes: Pattern 36 Spots: Pattern 47 2col honeycomb: pattern 73.

The pattern to make these:
Front bed needles start on left on 30. needle seq: 1.11.11. to end .1 ending on needle 30 on right. on the back, 11.11.11 to last three 111; I didn't count how many there were in total, for 2:2 industrial rib, gave me 60 st.
Handle down, rack one needle to left.
Cuff:
Colour 1:
Blue strippers, N/N, T2, 1R,
CX/CX T3.5, 2R, rack one needle to right
N/N, T3.5, 1R. reset RC 000
N/N, T3.5, 20R.
Transfer sts to the back bed, I put the two front bed stitches together and transferred them into the single vacant needle.
Leg:
Black strippers, handle up, GX/N, T4.5 (for the rest of sock), 2R, transfer 15 sts each side to front bed.
(If doing other colours- Colour 2:)
pusher set up: starting on front bed, left side, 4WP (up), 1RP (down) right around both beds, in continuous sequence, ending with very last one on left hand side of back bed DOWN.
DX/DX, 4R, Col 2
CX/CX, 4R, Col 1
continue this 8R sequence to row 143 (col 1), lock on left.
Heel, Col 1:
BX/GX, work short rows to 10 sts (put some weight on heel) and back (lock on left). work one row on the back bed (keeping to pattern).
Foot:
Pusher set up: back bed remain unchanged; Front bed, last needle (on right) is DOWN, the rest are up and will be making stripes on the sole of the sock,
Col 2: DX/ DX, 4R
Col 1: CX/CX, 4R
Continue this 8R sequence to row 142 (black)
Toe:
Col 1:, CX/CX
Pick up 3rd st from each end, put it on top on 2nd and at the same time, pick up 1st and 2nd together and put where 3rd and 2nd were, on all ends. 4 sts in total, each decrease.
on rows 142, 150, 156, 162, 166, 170, 174, 178 then ev 2 RC (single row) until 4 sts are left.

Here it is stretched out, which they will do in places, when worn.

Suggest Pusher Set up for these size socks or whichever combination you like, BUT the LAST PUSHER ON EACH BED MUST BE DOWN.
48 sts - every 4th
52 sts - every 5th x 2 and 6st x 1 in the centre
56 sts - every 7th
60 sts - every 5th
64 sts - every 4th
68 sts - every 4th x 8 and 5th x 2
72 sts - every 4th or 6th
78 sts - every 4th x 9 and 3rd x 1; or 4th x 8 and 7st x 1 in the centre.


Wednesday, March 4, 2009

Heel Flap Machine Socks

Upated 15 Mar 09:
I've made a second pair, rotating a quarter turn, as per Dresda's Pictorial, picking up the 24 stitches, putting back onto the machine. I used coins as weights in between the beds on the heel flap to keep the stitches in place. It was a lot more fiddling - perhaps it was because it was black and difficult to see (?) Anyway here is it's picture:

Updated 7 Mar 09:


Firstly, my friend Stephanie has an excellent tutorial of doing Dresda's Heel Flap Socks which I'm basing mine on. My daughter prefers heel flap style and I'm using the above as a template. (I also have three to make for my BIL Dave) I'll only expand on where mine vary (so if anything's not clear, check the tutorial for explanation):

Cuff:
Cast on 60, L30, R30, 2:2 Industrial rib = 1rack to left, T1, N/N, 1 R; T5 CX/CX 2R; rack 1 to right, T5, N/N 1R; Reset RC000; 20R.
Trans to back bed. 2 rows GX/N, divide and put 15 from each end onto front bed. RC 000

Legs:
T5, CX/CX 140R.

Heel flap. 30/30
Row 1: T5, GX/BX right arrow; alt pushers = 1xWP, 1xRP. END pushers are always in WP.
Row 2: T5, GX/N (end of this row, reset end pushers to WP and flip lever.)
Repeat these 2 rows 24 times (48 RC)
Heel turn:
T5, GX/BX (REMEMBER to reset the arrow to 0) turn the heel using pushers and moving stitches inwards as per tutorial:
Heel turn numbers for this pair:
Work17, 2tog, work 1, turn (19 stitches worked),
work 6, 2tog, work 1 (slip 1, work 5, 2tog, work 1 = 7 stitches worked, bring slip pusher back into work)
K7, k2tog, k1 turn (slip 1, work 6, 2tog, work 1 = 8 stitches worked, bring slip pusher back into work)
P8, as before, then, K9, P10, K11, until 18 sts remain.

Reposition for gusset decreases:
Take off the machine with 4 x decker combs at halfway point for each quarter eg, back bed = 9 on each comb; front bed = 15 on each comb.

ROTATE 180 and rehang, so it's easier to do gusset decreases. 24 stitches each side must be added for the gusset. (96 total, 48 each bed, 24 each quarter).

THIS DID NOT WORK - there is fabric is too tight to stretch across the beds: pick up 15 each side for the back bed and 9 sts from heel flap for the front bed combs on each side)

Some things that do:
e-wrap 24 sts each side and continue (my machine wont knit ewrap so I had to manually knit 4 rows before it would cooperate). I liked the finished edge, smooth and will graft easily onto the gusset.

Crochet 24 sts each side, either on scrap to undo and kitchener later or in same yarn and continue.

I am going to Different e-wrap shown in the Hand Manipulated Stitches book p37 - knitted back double epwrap cast on - This worked really well. ewrap first needle, wrap around the next bringing the thread back over the original needle and knit off one stitch; then move onto the next. Check that all stitches knit properly on the first CX row, much easier.

(You may have to HAND KNIT added stitches for first row - not with the double knit ewrap it knitted). Put some weights on the sides and on the added stitches. RC 000

Gusset decreases:
Place a marker (pusher in RP works well) at the 15 st mark each side FB:
T5, CX/CX, knit 2 rows = RC 4,
dec 1 st each side; at the 15 stitch mark, TAKE it off the needle and put it onto needle 16 now move stitches along to empty needle as per tutorial,
alternating: racking left then right, moving one stitch to the front bed REMEMBERING to ROTATE it instead of flipping FROM BACK TO FRONT (or you will have these cute little purl stitches interupting the lovely flow of sock AND undo the back bed right end stitch before transferring).
Repeat 26 times, (RC 56), then every round until 60 sts remain (RC64) no reset.

Feet:
T5, CX/CX to row 134 (DAVE 124)

Toes:
Dec 1 st each end (on second needle - leaving the outside stitch running up to the toe) all beds, 4 in total on next then on row 142, 148, 154, 158, 162, 144, then every round till 8 sts remain.

Dave's variation: to RC 124, then toe decreases on row, 132, 138, 1444, 148, 152, 156.