Sunday, December 21, 2008

Twis the week before Christmas

This week has been a finishing week.

On 16th I knitted the last stitch, wove in ends grafted edge for my Hot socks Nanna rug:

I started in March 08; it is 8 x 15 squares, half square border, 7 x 100g sock wool. 2 x 100g grey socks wool, done in garter stitch with 2.5 needles, and took over 170 hours to knit. And on my legs and feet as I type.

Then later on 16th, I knitted the last couple of rows of my Fetching Mitts: As there are 7695 finished pairs of these on Ravelry (as at 9.00AM Sydney Oz time, 21 Dec) I decided to take an "arty" photo:

Although there is a cool breeze coming through the window and making my feet cold, it aint cold enough for me to wear these.. they are in the drawer waiting for 09.

Having finished both these and doing RnR (rip and redo) of my knitting machine Minty Fresh and building up the strength to go another round with the KM - there was only one thing to do:

Pick up my CPH and knit. I went with the collar and looked on Rav to see how other collar doers did, so, collar first, and bands extending across the collar. That decided, I've done the collar and button band and am onto the buttonhole band. Shelley, my SnB friend gave me a quick lesson on mattress stitch, and I've even sewed up about 10cm of one of the sides.

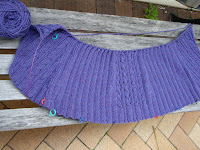
I did make a positive start on my Crescent Moon scarf, I've redone the "cast on 13 sts" to the same as the Swallowtail shawl, do the K2 garter and pick up the purl bumps, very happy with this, much much better, and have taken it's prelim photo, may rip it back and redo a little section I went back and didn't fix very well, I will do a post just for it sometime next week, after I've had a bit more of a think about it.

It was a cool day yesterday so I asked daughter #1 to help me model my Drops sleeved shawl, here is my "arty" photo, the rest are on flickr or Rav.


So as I'd done some "arty" photos, I got friended on flickr by a photographer... Oh my stars! I shall never whinge about stupid arty photos again! It's my pet hate and proof that it's one anyone can take, but show me the knitted item as it really is: front, back, no hands in the way, no belt pulling in a too big, no arms over the head to cover the lousy sleeve cap contruction.. only showing the side view to hide the fact that it makes a skinny model look frumpy.. (ranty over now). So that will teach me, wont it?

Well, I'd like to wish everyone a wonderful stress free Merry Christmas. (And thank you for reading.) And give you one of my beaded cards:

Sunday, December 14, 2008

SSS Britannia

Swirly Shawly Sleevy Britannia is finished. It is my thinner version of Drops Pinwheel Cardigan. One of the comments against this style of garment was that a circle doesn't make a cardigan. I think that is probably correct, so I decided to make a shawl and put sleeves in it to keep it from falling off. That decided, I went to the stash and chose 4 x 200g Bendi Mystique Britannia. Once started, I continued on the largest chart to 20 stitches between the pattern, measured, and kept going to 26 stitches, plus pattern. Then put in the sleeve division (on waste yarn); PM/50/80/50/PM (marker/ sleeve/ shoulder/ sleeve/ marker) and when I do another one, I'd add 10 to the shoulder 50/90/50. The PM designates underside of sleeve.

I decided to knit up as much of the wool as possible, so I completed both sleeve and put the remainder into the shawl section: one extra repeat of the 12 row pattern (as shown in the middle size) and repeated 12 rows ribbing once so I have 6 repeats, not 3, casting off on the final pattern row. (720 stitches, measures 110 cm in diameter.)

Sleeve: pick up 50 + 6, dec 2 sts every 6 rows to 78, continue in 3:3 rib/berry stitch, but dec 2 sts every 4th pattern row to 66 sts, then 13 repeats of 4 row pattern in total, casting off instead of doing the final pattern row.

I'm thrilled with my shawl (with sleeves). I'm do feel every little cool breeze and will get a lot of wear with it staying put. (Even if I treat it like track pants - never to be worn out of the front door!!)

Sunday, December 7, 2008

Minty Fresh aka Pull a Torsades 468

I've decided to try making this on the Passap. Here is it's first attempt picture:
Problem: ladders, cables crossed in the wrong place, rib too tight.

Link: 468 Pull a Torsades from Bergere de France free pattern.

I'm making it in Bendigo 4ply Cotton, which is new to me and the machine.

Working notes:
I used some knit-in elastic for the rib. I didn't think things through, and on the first attempt, I didn't put in a marker (remove the pushers from the rail) for the cable and went two stitches out of alignment. I forgot to do some of the cables and I had ladders for not putting the handle down for this type of stitch alignment. AND the tension was too tight on the rib and too loose on the body. I will need to put an extra needle into work behind the cables on the row prior, to allow the cables to cross comfortably.

Rib 2:2 (cast on T1, N/N x 1; T3, CX/CX x 2; T3, N/N x 1; RCOOO) T3, N/N x 12**.
**11th rib row: T4.25, don't put knit in elastic. (probably easier to do 7:4 rib from the start or quicker to do rib by hand and put onto machine).
Number x9th rows: Two needles put behind cables.

OK T4.25 is too tight I got sick of putting the stitches back onto the needles, didn't have that problem with T5. I'm going to trial doing 7:4 rib, with elastic should be fine, at T4.5, then do body in T4.75.

Now picture: rib T4.75; body T6.5

Swatched as per Stephanie's instructions, and did the various stitch sizes recommended. I settled on 6.5. It is loose off the machine, but will shrink down when washed. I'm doing a bit each day and it's getting easier to flip the 2 pairs of stitches, and the cables are no dramas. I've put 2 spares behind the cables for ease, which has made eyelet style holes, and there's a few ladders, but I think they will be ok. Nothing I can't wear when finished.

Sunday, November 30, 2008

Clapotis Scarf - Machine Version

Monika Stramaglia's Clapotis on Machine is a wonderful machine adaptation of the knitty Clapotis. Monika's version is done one the bias, but I wanted a quicker knit, so mine is straight.

For my first attempt:
I used 14 sets of 5 x working position / 3 x resting on the front bed and on the back bed, one needle on each side of the 5 needles and to the left, and used racking one needle back and forth to set the edge stitch. This would be excellent for using up a cone of slippery yarn. (diagonal as per original or straight). However, this used up a lot of yarn, making it about a metre (40") long.

I did another attempt using front bed only but that I had considerable trouble with the cast on (again!) and have officially given up on the e wrap method. My machine doesn't like it one little bit.

Last Attempt:
Front bed only: I upped the tension to T4.5: 12sets of 5WP/3RP and crocheted the cast on stitches onto the combs, it was slow going at first, but quite happy with it thereafter and will certainly use this method again, leaving the 3 x resting position chains inbetween. I'm just so relieved to have this work, it was the most fiddly. The counter says I did 552 rows and it ended up being 1.5m long.

I will do a diagonal version of the scarf, but not this side of Christmas.

Tuesday, November 18, 2008

Knitting News this week

Denim Ornettes aka the Dodos: (focus and finish project): And frogged! Why you say? Why? Well, run out of yarn didn't I? right out. I'd just done row 18 of the foot chart when I noticed that there wasn't a lot of wool left, so I measured it, about 18 m.. and I was knitting over a metre per row at this stage, absolutely no way I had enough yarn. I didn't cut the first sock as it was a little bit big and thought if it looked like that I'd run a bit short, I'd rip it back and reknit it smaller from the heel. Not going to happen, it's short by too much. I'll redo the Ornette pattern at a later date. Meanwhile I do believe they are named for the wrong bird and are now could rightly be called Dodos. I've rewound the wool, but not blaming it! I'll find it a something really special for it, I will.

Go Fetch: (SnB easy knit) My time with the group was cut short last week - family BBQ commitments, with the EX husband AND his extended family, at the EX husband's place, BLAH! Nevermind, I did get a little bit done there and was able to do heaps when Daughter #1 drove half way there. I even "borrowed" some of her wool from her entrelac beret scraps for the thumb (yep past the thumb already). I've got one more row then start the cables. I'm going to make them longer then written to match my longer self.

Hot Socks Police Nanna Rug: (long term project) is doing the edge. Just picked it up and did a count, if I cover at least two squares a day, I'll be able to finish it with the next focus projects; CPH cardi; then Bannisters jumper.

I've been ploughing through that pile of unfinished so well, I've given myself Sundays: I can do as little or as much knitting as I like. (Just so long as I don't fall back into my old habit of stuffing my face with food! Hopefully I've moved on from doing that.) I'm looking at a long sleeved big circular back motif wrappy/cardi/shawly thingy and found a really nice pattern from the Norwegian DROPS site. I bought an alpaca blend from Lincraft, similar to what was recommended, it worked out well but would come to over $70. No way I can justify spending that when I have so much stash to knit through. So the two Alpaca balls will be turned into another pair Fetching mitts. Which meant if I want to make it, just what do I have in my stash that I could use? I settled on some Mystique in beautiful deep blue "Britannia" in 8ply. I didn't think it would disadvantage the end result if it was done in thinner yarn, especially when I read one of the Rav comments thinking it was a good idea. Just so long as the fabric was firm enough to hold it's shape with the yo and lace holes. To start I'll do the largest size to 20 stitches between the yos, and on Sunday I'll get the calculator and tape measure out to work out what to do next! I like this idea Monday to Friday really plough through those half finished projects and fiddle around on Sundays. Especially with a project like this one, where, by all accounts I've read, gets hideously boring doing the endless rounds as it gets towards the outside of the circle. One Rav knitter did the sleeves inbetween to break up the monotony, which I may do too as the thing gets bigger!

So I did end up buying 2 balls of Alpaca blend this week, but with the back up plan of turning them into top down Fetchings for next year's winter, they didn't actually end up in my bottomless pit of stash, as they are already in the Saturday bag, hopefully that doesn't count!

Friday, November 14, 2008

What I've been up to this week


First things first: (smile, smile) here is the beautiful Silk Merino Moonlight Blue, I won last week from Daphne's October giveaway:

I don't know what I'll make yet, either Print o' the Wave Stole or Japanese Feather and Fan Shawl or In the Pink Shawl.

It's still in it's skein, ready to take to SnB for show and tell.

Now this week has been remarkably unproductive, so here goes:

Ornettes: focus and finish: Right sock finished. I did my usual Regia style toe, but I'm using thicker wool and bigger needles on the biggest size.. hmmppfff ttttoooo big. Oops, redid keeping the diagonal pattern travelling along the side. NOW for the worst bit. The "quicker" left sock. OMG!!! if only I'd started this one first, I would have changed the mock cables. Wait for it: you slip two stitches knitwise onto your right needle, THEN put them back on the LEFT needle, THEN put your RIGHT needle into the SECOND stitch on the left needle - from the back - AND KNIT IT. But wait... there's more fiddling - KEEP BOTH on the left needle - somehow - then knit two together TBL. I've invested so much time into these already, GRRR. I love the pattern, the wool and the finished one, but finding words to cover the pain-in-the-arsedness of the left mock cables is beyond me. Safe to say I'll not be making a second pair as written.

Go Fetch: SnB knit: CO45 seems to be to go, all packed up in it's zip lock bag, ready for it's outings on Saturdays, and here is it's picture for the four people left on the planet who haven't seen Fetching Mitts.

Police Hot Socks Blanket: long term project: finished the extra square down the side making it 8 squares wide, I'm glad I did, I could have made a pair of socks with the extra ball I found, but I'm happy it's in the rug. May even finish by the end of the month. That'll be a sad day, I'll miss it!

If I keep having difficulties with the left Ornette sock, I'll do a couple of rows a day and swap it with the CPH. There's a only a couple of days in each of the CPH, Bannisters and sock blanket to get them finished, which was my whole idea of having focus and finish project a week - to get rid of my almost done projects.

So this week, I HAVE added to stash, but it has a specific project: some Orange Blossom Chubby to make the other Cookie A's PDF sock pattern - Stricken Socks, not the best photo, silly camera! (and some secret secret stuff for presents). I'm not going to cast it on just yet, it's ready for the needles I'm using on the Ornettes.

I'm not counting my PRIZE of silk merino, I'm going to enjoy having won it for a little bit - then wind it into a ball when I choose what to make with it.

And Last but Not Least: To Rip or Not to Rip:
I've ripped my Diamonds cotton top. I've not knitted a stitch in months and months; I didn't knit elastic in the rib (it needed it); the actual pattern, though gorgeous was a bit too lacy (really am too old for too lacy); the yarn doesn't suit the pattern (too thick, would be better in thinner yarn); I had just started the 3rd 50g ball (not a lot of time invested); I've lots interest in it (sad but true). I've never actually done that before, I usually plough on and finish; maybe if I haven't finished it within a year it's time to give it a miss, so I did.

The next thing to have a really good think about is My Oblique - I've invested a lot more time into this one, almost up to the armholes in the all-in-one-body.... It's year is up in January, I'll see how I go with ploughing through CPH, Banniters, blanket and Ornettes.. these I want to finish.. I just don't know about the Oblique, perhaps I should look for a pattern to make it in instead. That would make it easier to rip I guess.

Saturday, October 25, 2008

Twist + Shout Jacket Mods

Lapel collared Twist and Shout

I liked the jacket, but I wanted longer sleeves with close fitting cuff and a different finish on the fronts. Here's my mods:

5.50mm needles gave me the correct width but not row tension, 23 rows not 26, which meant I didn't have to do any mods to the body to lengthen it. The sleeves I made to my length, but the sleeve cap and armhole depth on the body needed to be shortened.

The sleeves:
Cast on 54. I reversed set up row for knitting in the round.
Begin K2, p2 K4, place marker then as reversed to next place marker, then k4, p2, k2. Increases every 6 rows (I have long arms) every 4 or 5 would be quite OK too.
Changed the sleeve cap to no repeats of the 4 row shaping, reducing the height of the cap.

The body:
Cast on 268 = 272 less 1 stitch on each of the sides so that K4, P2 rib was continuous.
Reversed the setup row so it starts on the right side. Worked the body piece, as written, up to the armhole.

The back from the armhole divide:
decreased as written, but continued to 54 rows from commencement of armhole, then did short rows for the shoulders (4 rows).

Shoulder seam:
3 needle cast off.

Fronts from armhole divide:
I'll deal with the collar and neck shaping first:
starting with the 3 stitch knitted edge:
do the collar increases from there so that **2 STITCHES travels into the body from the edge and ++1 STITCH forms the edge of the collar

NECK SHAPING: on the **2 STITCHES: do the k2 tog or ssk on the inside stitch. EVERY 2ND ROW. There will be a couple of rows when near to the shoulders with NO NECK SHAPING, which finishes on the MIDDLE K2 between the cables (ie there will be 2 cable panels to continue working on and 2 cable panels decreased by neck and collar shaping). Continue decreases on the k2 travelling to the side/shoulder seam. Finishing up on the same row count from the armhole; the 22 shoulder stitches and the 15 collar stitches.

Collar: starts on the ++1 stitch edge:
the edge is always k1 RS, P1 WS
there is always a p2 (RS) next to the K2 travelling rib so it can fold over.
These four stitches stay together (place a marker if preferred).
Therefore the increase (make one) is every right side row; on the edge side the marker; beginning with p1; until the collar 13 stitches or the width preferred, so on the right side you will have K1, p2, k2, p2, k2, and so on finishing with the p2, **k2 (that travels inwards, by the inside stitch knitting over the existing 2 cable panels and finishes on the middle k2.)

Shaping From the Inside marker:
The travelling ribs and cable panel will now appear to CHANGE DIRECTION:
Up till now the inside marker has travelled up the garment, maintaining the 4,2 rib.
There should be a K2 rib at the beginning of the cables on the edge side of the marker.
(whichever side it will be a k2, p2, k4, ...to edge) DO NOT DO this decrease ON THIS ROW ONLY. leave the K2 in place. Move the marker if you like to the other side of the K2.
From here on do a K2tog or ssk to keep this K2 travelling up to the shoulder.
YES there is ALSO a travelling K2 doing neck shaping.

Collar continues
do the 3 needle cast off for the shoulder seams.
continue with the collar knitting the last stitch of the collar with the next stitch on the back live stitches, ie finish with p2, start with k2tog, to middle.
do 3 needle cast off to join the collar.

Finished 27 October 2008

Thursday, October 23, 2008

Twist + Shout Jacket


Progressing well on the body piece, which worked out really well. There is increase/decrease in the fronts every 2nd row, cables every 6th row, and waist shaping every 8th, none for 12, every 6th to keep track of, much easier in one piece. I didn't want a 6 stitch panel up the side and reduced each side by one stitch, to keep the continuity of the 4:2 rib on the side seam. I reversed the set up row as I didn't want to start on the wrong side. I'm almost up to the armhole divide. I'll do the back first, then the major changes to the front shaping:

That circular collar doesn't work, fit or look good so I'm going to do a lapel collar. The diagonal cable panel will change direction. Hopefully this will work out without too many rip and redos. I'm definitely not going to do the fronts as originally designed. I'll keep you posted, so to speak! (It did - only one rip back then I posted all the mods)

Thursday, October 9, 2008

Cherry Swallowtail Shawl


Swallowtail Shawl pattern is available from the designer Evelyn Clark as a free PDF.

Yep, started what I brought home, 'tis the rule. What a gorgeous knit, lovely pattern and yarn, both, fabulous combo. It's a 6 row repeat pattern, so I should be able to do one 6 row set, for the rest of the week, as I've finished this week's focus project. No More Adding to Stash! Work on finishing a different project every week. So far so good.

Finished 15 Oct.

The Knittery yarn is 650m, and the Swallowtail, as written uses 400m, lots of extra to put into mine. When I finished the 14 repeats, I measured out about 4m and it knitted just over 1.5 rows of repeat 15, so 16 m would do for repeat 15; then I allowed 1 metre more for the each of the following repeats; doing 20 repeats would take an extra 120 ish metres, leaving plenty for the borders.

For the Lily of the Valley borders, one more repeat of each, four in all.

Peaked edge: did extra one extra repeat on the last 2 rows of the chart, then followed Evelyn's PDF instructions for the last two rows and cast off.

I really enjoyed making my first ever shawl. I had it on my shoulders last night, it was quite warm too. Now if the weather if kind, I will block it and put up it's final picture.

Friday, October 3, 2008

The Knittery's September Surprize

I WON!! ME!!!?? Normally I can't win an arguement... but it's official, I'm September 2008's winner of a skein of yarn from Daphne's theknittery.com. Daphne is due to have her baby any minute, but she assured me yesterday that she's still with us. I do wish her all the best for her and bub and that she enjoys her 2 weeks off work. (it's a toss up as to who will have the most joy in the next 2 weeks, Daphne and her bub or me and my prize skein!)

I took so long to choose something I'd like - so easy to have one of everything. I've chosen some 2ply silk merino "Autumn" colourway, to make a shawl. I will even take it's picture when it arrives. I love the chubby, it's my fav, unique and gorgeous colours, but I do have the Denim to reknit, I'm still committed to reducing my stash. I'll finish off my Police Blues rug, then onto the Daphne's September Surprise.

Sunday, September 28, 2008

Laiton VVH progress

Got Dotter #1 to try it on yesterday - inside out of course and it fits beautifully, so its onto the hood and finished in plenty of time for Christmas and before the weather warms up too much. It's all in one piece (wonderful) and is getting really big!

There's also an error in the instructions. in X-L Dec Row 3 it says to p to 3 sts before next marker, across the shoulders, which should be ribbed.

Other than that. It's going really well.

Friday, September 19, 2008

Garter Edge used on the Nanna Rug

Cast on 14 st on waste yarn/crochet sts. All rows: Knit.
Knitting from the outside back to the inside - pick up one stitch (loop) from the cast on squares and knit it (15 sts), turn, k2 tog knit 13. Along edge till the end of squares.

Knitting from the outside back to the inside - pick up one stitch (loop) from the cast on square corners and knit it (15 sts), turn, DO NOT k2 tog knit- SLIP 1 KNITTED INTO CORNER ST - knit 14, turn, knit 14 W&T, knit to end; turn knit 13 W&T and so on until 2 sts remain to be knitted and begin down the other side. knit 3 turn; slip 1, knit 2, turn; knit 4, turn; slip 1 knit 3, turn, knit 5 turn; slip 1 knit to end, turn and so on back and forth until back to knit 14, knit again into corner st, turn and knit3 tog.

continue down the next side as before, straight garter sts on side, attaching as you go, short rows on corners until you've gone around to the beginning again, unravel waste yarn and attach to end by kitchener st/graft st.

Tuesday, September 16, 2008

Hot Socks Police Blue Nanna Rug

Knitty Gritty:
squares are 10cmx10cm. (roughly 4"x4").
I used 2.50mm needles
I got just over 20 squares per 100gm ball of sock wool = 420m/100g.
My rug is 7 wide x still going till the wool runs out..
I decided to do a garter st edge, half sized = 14sts x 28rows, so I will be able to cover 40 edge squares per 100g.

A single bed is 90 x 190cm = 9 x 19 squares, for instance and would need 171 squares, 9 x 100g would be needed. and would need 150g to do a half square around the edge.

OK, here is my garter stitch mitred square DIRECTIONS:

All squares: knit every alt row

FIRST ROW:
FIRST square ONLY: cast on 57 = (28+1+28). cast on row is ON THE OUTSIDE
Next row & every alt row: knit
2nd row: knit 27, slip 1, knit 2tog, pass slip st over; knit 27 (=K27; S1, K2tog, psso; k27)
4th row: K26; S1, K2tog, psso; k26
6th row: K25; S1, K2tog, psso; k25
and so on. Continue till you have one stitch left DO NOT CUT YARN.

SECOND square and all squares in first row: pick up 28 from INSIDE edge of one side of the first square (first st is the one left from the previous square) and cast on 29 = (28+1).
Next row & every alt row: knit
2nd row: knit 27, slip 1, knit 2tog, pass slip st over; knit 27 (=K27; S1, K2tog, psso; k27)
4th row: K26; S1, K2tog, psso; k26
6th row: K25; S1, K2tog, psso; k25
and so on. Continue till you have one stitch left DO NOT CUT YARN.

Continue along in this way until you have the length you want. CUT yarn on LAST SQUARE

Step 1: FIRST SQUARE OF NEXT ROW OF SQUARES, starts on the opposite end, ie go back to the beginning and do first square UNDER the very first square done:
cast on 29 = (28+1) and pick up 28 from INSIDE edge of one side of the first square.
Next row & every alt row: knit
2nd row: knit 27, slip 1, knit 2tog, pass slip st over; knit 27 (=K27; S1, K2tog, psso; k27)
4th row: K26; S1, K2tog, psso; k26
6th row: K25; S1, K2tog, psso; k25
continue till you have one stitch left, DO NOT CUT YARN.

Step 2: ALL "INSIDE" SQUARES:
Pick up 28 from INSIDE edge of one side of the first square (first st is the one left from the previous square), 1 from the centre then 28 from the other side = 57sts.
Next row & every alt row: knit
2nd row: knit 27, slip 1, knit 2tog, pass slip st over; knit 27 (=K27; S1, K2tog, psso; k27)
4th row: K26; S1, K2tog, psso; k26
6th row: K25; S1, K2tog, psso; k25
continue till you have one stitch left DO NOT CUT YARN.

continue along in this way until you have the length you want. Cut the yarn on the last square.

Repeat these steps 1 and 2 until you have the length you want (or the wool runs out, whichever comes first!).

Monday, September 1, 2008

Green Dragon Socks

This pattern should drop straight into your favourite sock pattern, but with a few extra stitches. Especially important is: if you normally knit with 2.25mm, you will need to go bigger, as this is a very tight knit. This will save you ripping it back, adding extra stitches and doing them on 2.75s or 3s. You could add one extra sts in the knit panel at the front of each panel and cast on 76sts. (Please note you will have to adjust the length to suit you).

Cast on 72 – 2.5m 2:2 rib starting with P1, for 10 rows.Change to 2.75mm needles, for smaller fit, try 2.50 or larger ankles, do 3.00 on leg section.
Knit first row and all odd numbered rows, then commence chart on row 2 repeat 4 times (80 rows).

20

M


/3


M

20
18

M


/

\


M

18
16

M


/


\


M

16
14

M

/


\


M

14
12

M
/


\


M

12
10

M


\3


M

10
8

M


/

\


M

8
6

M


/


\


M

6
4

M


/


\

M

4
2

M


/


\
M

2


M

Make 1


\

SSK


/

K2tog


\3

S1 K2tog, psso


/3

K3tog


knit


Heel: Divide 36 upper/ 36st heel: do whichever heel you prefer. Mine is short row heel to 12 st and back.
Foot: discontinue pattern on sole, work till work measure desired length. Mine is 3 repeats of pattern then do half repeat to row 11 (75 rows). Discontinue pattern.
Toe: Do your normal toe, Mine is dec 4 sts every 4th Row once, 3rd Row twice, 2nd row 4 times, then every row to 8 sts.
Graft toe and sew in ends.