Thursday, December 29, 2011

Resizing {Aidez} Spreedsheets for 8ply

This is for the people who don't know where to start when they see a lovely pattern and don't have the yarn suitable, either not available (in Australia) or they want to use up stash.

There are so many patterns that fall into this category I thought I'd write how I approach this process. I have some really nice Bendigo Woollen Mills Moorland Pewter in 8ply, which I think will be perfect for an Aidez Cardigan. (Sorry Berroco I don't think anyone in Oz sells it)

Can't remember who was asking me about resizing Aidez for Aussie 8ply either.

Starting with the charts provided and the construction schematic and all their instructions, here is how and what I did to keep all the design elements in the largest size in a thinner wool. I usually paste charts onto an excel spreadsheet.

Take note of the tension/gauge information:
Original: 15 sts = 4”; 16 rows = 4” in St st
My Bendi : 22sts = 10cm; 28 rows = 10cm in st st.

Trellis Panel: 30 sts
Ear of Corn: 8 sts
Seed Wishbone: 12 sts

Back pattern:
Original (which also gets pasted into the spreadsheet):
Establish Pat Sts: Row 1 (RS): K4(7-10-13-16-19), k1TBL, place marker,work Row 1 of Right Cross-St Cable over 8 sts, place marker, = 9 sts
k1TBL, k3, k1TBL, place marker,work Row 1 of Trellis Pat over 30 sts, place marker,= 35 sts
k1TBL, k3, k1TBL, place marker,work Row 1 of Left Cross-St Cable over 8 sts, place marker, k1TBL, = 14sts
k to end.

Centre back panel = 9 + 35 + 14 = 58 sts, which I divided by 15 sts/10cm ( divide by 1.5) gives us 38.67cm - then times by 22sts/10cm (2.2) making it 85 stitches I need to cover the same area.
I worked it out on an excel spreadsheet - much easier to do a resize like this on excel.

I recharted out the trellis pattern (30 sts div by 1.5 then times by 2.2 = 44 sts) easy to do, just keep going up the sides until 44 sts are reached.
I've copied my screen so you can see, I paste in the diagrams to make it easier to work out. Click on it to see a bigger version.


The rest of the patterns for the front and sleeve panels remain unchanged, however I put extra stitches inbetween them. Where the pattern calls for k1tbl, I substituted k3, I put in an extra crossed cable to "fill in" the amount of stitches the pattern covers but, on the left cross cable, on the LAST two stitches, I thought ktbl looked better, so I did that instead.

I could have just knit it as written with the extra stitches on the sides, but as I was knitting the largest size, it matters that the panel would measure 26 cm not the 38cm the pattern was written for. If I'd been knitting the smallest size, I may not have bothered but on the largest size, it would have been out of balance.

I work out where I need to extend the pattern so it covers roughly the same width, if I'm doing set in sleeves I work out where to place cable panels so they run up next to the final armhole shaping and it doesn't get cut off (a pet hate of mine - why or why didn't they move the jolly cable panel over 3 or 4 stitches so the armhole shaping doesn't cut off half the panel and it looks terrible? I don't know either - but I always check that before I put in a cable panel...)

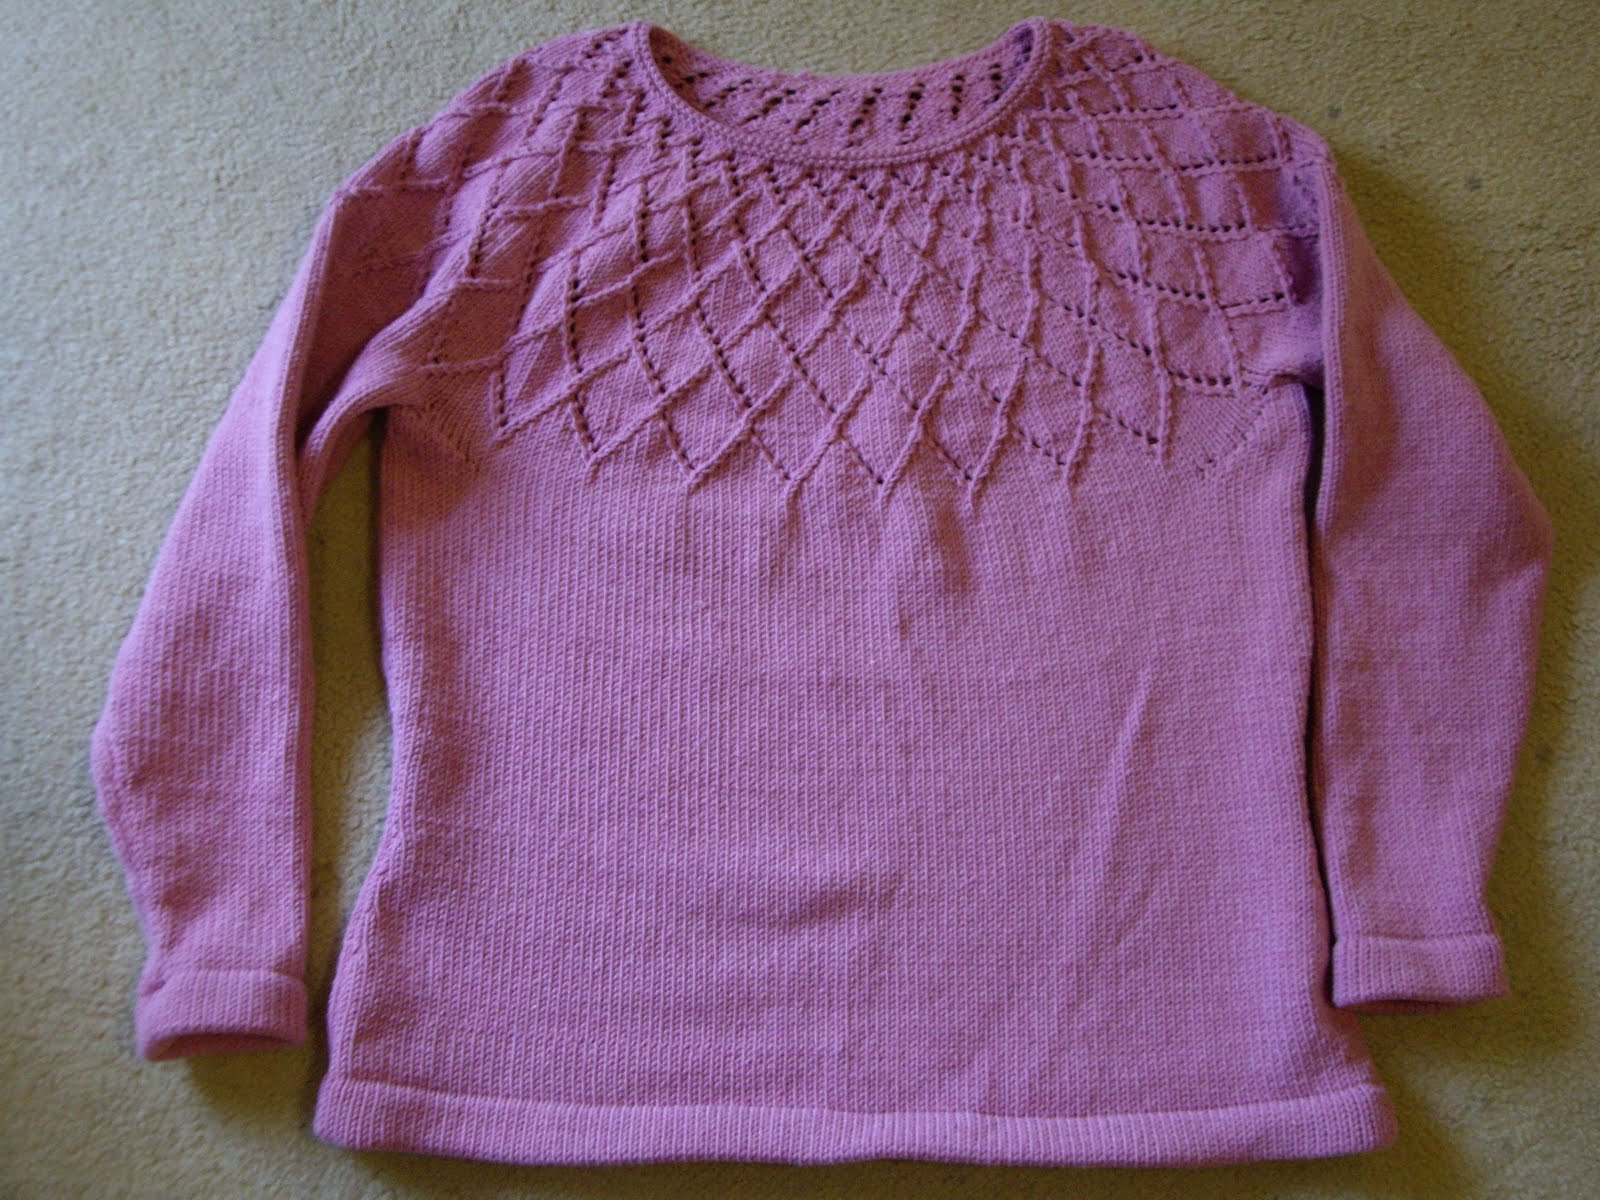
Anyways, I always have to add a little bit extra depth to the armhole to neck, body to armhole and sleeves so for this one, I worked out to finish the top of the back to coincide with the top of the diamond trellis pattern, as it was a raglan I knitted the body to the armholes, the sleeves I'd already knitted so I attached them straight away - an excellent trick I tried the last time I was adding sleeves, it is so much nicer to have the sleeves ready and waiting for the body, but that's just me.

The spreadsheet makes it easy to work out how many stitches for my raglan shaping. For me 80 rows of raglan so I don't have a cardi that cuts under my arms.

So on the sleeves I know I need the initial armhole decreases, (16 sts) then 80 sts for the raglan which will leave me with the centre panel (and no the original hadn't added enough for anybody, most comments were that sleeves were too tight) and the back? also easy, working backwards, the last thing it says is work to xxx sts remain. Get out the calculator and divide by 1.5, times by 2.2 and that is how many stitches you have to have left and in my case, plus 80 sts for the raglan and 8 each side for the initial armhole decreases. Then the fronts - I must have 8 + 40sts for the raglan, normally that's it, but on this particular design, the front panel is knitted at the same time.

This is where I altered the design. I added a few more stitches for the front, and took them away on the neck edge - only 10 extra, which took out the seed stitch panel and the front panel is still extended to the back. I thought it was too much bunched up around my neck and it will sit better.

I hope that explains how to go about working out how to make a pattern written for yarns you don't have, but (like me) would like to use something you've found that will be perfect for the project. And fit when you've finished.

Tuesday, December 20, 2011

Ready for 2012

Well I've rummaged, pulled apart my spare room, excel spreadsheeted, listed projects and their yarns, brought them out to the loungeroom and sorted them out into which machine/s they will be made on .. and.. and this morning I took their photo, cause Ann asked to see it - no really - She. Did. So here it is for Ann:

This pile of wool and cotton is bound for the Miss Pinky Passap on chair one and Yoko on chair two:


This one has my wildcard projects in a bag. One is the Electric Blue Allegro, that I had put aside for that lovely Vogue Pattern Forestry. But.. I only bought 4 balls and that won't be enough, but I do have 5 Highland Heather and I wont run out.

The other bags are gorgeous Chyrsanthemum colour 8ply and this really cool blue and gold mystery stuff called "show special" that I bought at the Sydney Craft and Quilt Show in July. I have used up the rest of the stuff I bought - in the Rustic felted slippers. Well I think can all be my wildcard projects, I haven't a clue what to make with them, but hopefully I'll get an inspiration sometime during the year.

And here it all is, all bagged up ready for some 2012 machine and hand knitting.

Sunday, December 18, 2011

Getting Ready for 2012

I've finished up my Christmas knitting. Packed away my Japanese machines, Miss Pinky is up and staying up, and she's ready to go. And I'm clearing out the last of my hoarded junk and sorting out my stash.

Over on Ravelry, we are having a 12MKAL in 2012 from stash only. Well that is wonderful, but that won't be enough to get through my overflowing floordrobe. I've picked up all the bags and boxes from the floor, listed them, sorted out my Rav stash page and projects, patterns and so on and I've spent today sorting it out on an excel spreadsheet. Assigning the machine/hand. And I've been running around finding some of it in boxes and tubs, cause of course, not everything I need is on the floor is it? No. Some of it is packed away where it should be. I'm going "cold sheep" in 2012, not buying anything for a whole year. And I really need some vests.

My friend suggested I put it into those big plastic zipper bags - found them - and tomorrow I'll be able to pack everything up and finish repacking my spare room. Clutter free house coming up.

Wednesday, September 21, 2011

Felted Slipper Boots

Working notes for felted slippers with longer ankle section.
Theo wants a pair. He loves the pair I already made him, but would like the next ones to have higher legs section, so his ankles don't get cold.

Theo's beloved slippers - before they were felted
I'm trialling a pair structured this way and Loz is crash test dummy.
Made on my midgauge SK860 aka Yoko, using that fabulous Bendigo Rustic 8ply. Which felts like the clappers, as we'd say. However, 8ply Bendi isn't the thickest - even felted, so I thought I'd make them with some padding. And to help me identify which area/s need improvement I did each section in different colours.
inner sole - bluestone
inside ankle - green tweed
outside ankle - damson
heel - green tweed
sole - damsom
toe green tweed
upper - damsom
Well, without any further adooo. Here's what I did.

It is necessary to know how long/wide you are going to make the foot section. The inner sole covers the entire section, from half of the heel and toe. I'm not sure if the the heel side of the short rows and the top of the toes need to be doubled as well or if fully lined would be good.. We shall see.

Make two inner soles:
Cast on 26 sts on WY, with MY, T8, knit one row, set carriage to hold. RC000.
put centre 8 needles and all 9 needles on the right to hold.
knit one row.
pull out 8 stitches on the left, wrap needle next to the carriage (side)
knit one row and wrap the yarn under innermost needle in hold and working from the centre to the outside, alternative bringing one needle into UWP on the opposite side to the carriage and wrapping under the next needle towards the outside each time, until the end.

In other words, identify the centre panel of needles and each time - wrap the needle on the same side as the carriage and put one needle back into work on the opposite side - each row - but wait, there's more to do..

Side levers go forward. and I left them there for the entire project.
Ev 4th row EON alternating slip stitch is worked.
to do that - leave the carriage in hold and the outside needles don't knit. but with the 1:1 ruler, bring every second needle to Upper Working Position (UWP) and set the carriage to slip. The needles in UWP are knitted, so make sure the first one is next to the new stitch being brought back into work.

Yes I know this is a little bit of work, and I did need to concentrate, but once I got into a rhythm, it went well.
My notes say:
C026 WY, 1 row, working short row from the middle 9/8/9 and EON slip st ev 4th row..
Keeping the EON every 4th row - and I found alternating which needle was slipped gave an evently felted result. (from the experiments I did on the bag a few weeks earlier).
Work K 60 rows then
short rows to 8, take it off and set aside until it's time to graft onto outer sole.

Now onto the ankle part.

I thought doing this in one whole piece was a better option than doing it in two sections. I trialled doing the joining seam in the back and the other one in the front. Loz will tell me which one is better.
Inside and outside pre felted shown

Cuff - I'm not going to explain how to do the slip EON alternating needles ev 4th row - see previous instructions.

CO 63 (1 for join) T8 - cuff on WY, change to Col 1, then 1:1 EON slip st ev 4th row 30 rows change col 2.
knit 2 rows, pick up loops from slip st EON and continue on till all rows /loops are worked.
T9 - join together 1 row.
T8 - Divide up 13/5/26/5/14 (= +1 for join) which is for back/sides/front/sides/back
take off 26 = for front in the middle of the work, then the 5 each side onto bobby pins then transfer the 13 and 14 (overlapping the centre stitch for 26 sts getting ready for the heel to be worked. Change to heel colour short row down to 9/8/9 join inner sole on all needles and work short rows out. - joining loops from slip stitches ev 4th row EON.

Change to under sole colour and reset RC AND keep a note of where you are with the every 4th row pick up loops.....
Theses are the things that are going on at the same time:
putting on the loops from the inner sole every 4th row
putting on the side stitches one at a time from the bobbypins (ten times in total)
putting the bar from the inner sole onto the end needle after the side sts only (ten times in total)
NOW pick up those side stitches, on opposite side of the carriage, pick up one of the bobby pins and put it on the last needle AND a side bar from inner sole, but just for these 10 stitches, AND keeping the putting the loops from the inner sole every 4th row (don't forget), for the first 10 rows - opposite ends of the carriage is having side stitches put on from bobby pins, loops are onto the correct needles every 4th, when that's done, continue to RC 60 rows, but don't join to the inner sole - that's done when the top is formed.
Now change to toe colour and work short rows to 8, attach the end of the inner sole, continue graduations back out to 26sts, change to top colour and join to both sole pieces SAYG to end.
Graft (kitchener) to cuff.
Secure and weave in ends.
Felt to desired size.
Stitch and row count may have to be adjusted. Loz will let me know if every second row would be better, whether the back of the heel needs to be double thickness - top of toes? top of foot? too soon to tell.

Friday, July 22, 2011

Felted Fibonacci Bag

Continuing on with Slip Stitch Felted things. And my fascination with Fibonacci stripes... I have made a felted bag.

Done on my SK860 - Yoko in more of the 8ply Rustic I bought for felting. It was cheap, what can I say. And I don't always have to have bright stuff, I can do subtle.. Really!

The Fibonacci sequence is 21, 1, 13, 2, 8, 3, 5, 5, 3 8, 2, 13, 1, 21 rows in alternating colours. I don't cut the yarn, instead I pick up the colour from the side it was on last - much, much easier having no ends to weave in and the felting squishes them rather well.

The first thing to do is prepare the inside gussett.
T7: on WY cast on 70 sts, change to main yarn and do the EON slip stitch every 4th row. Work 20 (or more) rows. Take off with deckers, WY, garter bar - whatever and set aside.

Now the the bag itself.

T7 ***( I did 7, but if I make it again I'll try it on 6 for a tighter edge only for the folded hem on the top of the bag)
T ?6: C/O 80 work 3 rows,
1 row EON slip stitch, (RC4)
straight to RC7
1 row EON slip stitch (RC8)
straight to RC13
next row pick up slip stitch hem row (RC 14)
straight to RC18
pick up slip stitch row RC19
Knit to 20
Join to cast on row.
Change to T7 and work straight to RC31.
Every 10th Row, begining at RC31, decrease one stitch each end to 70 sts, and begin Fibonacci sequence. I didn't bother with resetting the RC, I counted the sequence while I was decreasing. The last one was on the last row of the 5/5..HERE IS THE LAST DEC.. before change of colour to 3/8.
OTHER SIDE BEGINS IT'S INCREASES at the same point.

When finished the Fib sequence. Change to the base colour, I decided to use the colour I started with (I had more balls of it is why...) Rehang the prepared base liner. (I used a different colour cause it was left over from the slippers and I only had enough for 20 rows).
It's on the inside of the bag so it doesn't matter.
work 3 rows , hang the slip loops every second needle and repeat till the loops are all worked, work 3 rows, join the cast on edge. I didn't offset the loops, kept them on the same needle every 4th row - yes it does make a difference to the finished felted result.

Next thing is to reverse the sequence colours, remembering to increase 1 st each end at the beginning of the ..5/5 row sequence.
Reverse the bag edge, REMEMBERING TO do the slip stitch row on the 4th row (and yes I did forget and have to undo the stupid thing and do it properly). Join again by either, slip stitch or kitchener it.

Sides and handles: RC000.

Pick up 10 stitches (the bars) from BOTH the outside and liner onto the same needle.
Using sew as you go, join as you work to the beginning of the folded hem. Stop and put on WY etc.
Do the other side the same.
When up to the Stop and put on WY etc, put onto garter bar and flip it over, to do the underside of the handle.
Move the carriage to the side that has the yarn joined to it.

Handle: Keep going with the sew as you go on the inside foldover and;
Work 3 rows
Work 1 row EON slip stitch ...But the next time alternate the needle it's going on. Exactly like the sock heel flap.. makes a big difference to the handle's finish after felting, so yes it's worth doing. I used the needle selector ruler, put it on the side that the first needle next to the carriage pushed up that sequence, then put it to the opposite side so the next turn to do the slip stitch row, the first needle on the other side pushed that set up.
keep going (alternating the needles being pushed) to RC 180 or more and begin the sew as you go on the inside of the fold over AND the slip stitches every 4 rows.
Take off the machine (garter bar is good) re hang, making sure it is NOT twisted, loop side is facing out, rehang the held stitches from the side.

Working sew as you go on the opposite side to the carriage the whole way, work 3 rows, pick up the loops to the end. take off and kitchener stitch to the other side so it looks neat.

Weave in ends. There isn't any sewing, it's all done. There aren't any ends from the stripes either, because the carriage is moved to the side of the next colour.

Felt.

I used the dryer as the front loader isn't as good for this.

Hand washed all the stuff I'd knitted for felting (a bit of red dye came out of the hats and slippers.) I washed in hot water, rinsed in cold, then hot, then cold until the water ran clear and chucked one bag, one hat and 8 slippers into the dryer, I stopped it every couple of minutes to check on things. The bag was done first. I didn't want to felt to too much, and it was done at a lower stitch size - I didn't give it as much room to felt down. (then the slippers and then the hat for 5 mins extra).

The wool I used last time to felt wasn't going to give it up and I had to chuck it in the front loader on hot wash with a pair of jeans. But the Bendigo Woollen Mills Rustic is a dream to felt.

Slip Stitch Brim on Two Hats

I bought some Bendigo Woollen Mills Rustic 8ply in 50g balls from the Sydney Craft and Quilt show in June. I wanted to do some felting experiments with slip stitch as an alternative to garter stitch on the SK860 mid gauge aka Yoko.

Basically, they are the same hat design, but in different sizes so I could felt one.

I'll write up the unfelted hat first, it's a beanie with a sun visor is what it is.

Prepare the Brim first:
T4: Cast on 50, (ewrap), and do two things at once: every 4th row, do one row EON slip stitch, (two posts back is details on how to do this). First thing is do short rows, 1 needle end of every row down to 17 sts and then do two rows, starting across the 17 sts, to the end, one complete row then a part row back to where you started and short row back.
On the way back, pick up a loop and put it on every second needle (EON).
Put the cast on edge but don't knit. Take off machine however you like, WY, garter bar, knitting needle.

Crown:
Cast on 120 + 2 (one extra on each ends 11.1.1 ~ 1.1.11) EON for a mock rib. work 20R. Join up the cast on edge into the empty needle, don't knit yet, put the brim on.
However, what I did in the photo was put the brim on top of the mock rib, however, I put it UNDER on the felted one, which I liked better.
Next, knit one row, mock rib, both edges of the brim, all in one row. Reset RC to 000.
Work straight to 50 rows.
skipping the Edge stitches - don't count them, they are being sewn together. (What we are doing is K2tog, k6 repeat to end). put needle 2 onto 3, miss the next 6, then needle 10 onto 11, and so to end and fill in the gap = rehang however you like - garter bar, waste yarn, circ needle. knit 4 rows.
Reducing the missed stitches by one needle each time, do this twice more (three lots of 4 rows inbetween), then every second till there are no more stitches inbetween.

I completely messed up the first one because I did not make sure, before I did the 2togs, that I was on the correct needle and that I had the correct number of needles inbetween.

Finishing: take off, thread through the loops, sew up back seam, weave in ends.

Next are the numbers for the felted version:
Brim:
T7: C/O 72, short row sequence: 1 sts at each end 10 times, then 2 sts each end to 22 sts and back, while doing the slip stitches, EON every 10th row.
Crown:
C/O 160 + 2, EON mock rib, 20 rows, same as the other one.
Join the end of the rib, cap under the rib, knit one row.
Knit 16 rows,
Skip the first needle, then 2 tog, 8, to end, three times. (three sets of 16 rows) Same, reducing of the needles inbetween,
then do the same every 4th row till none are left.

Finish the same.
Felting. I had a real feltathon so in it went in with 4 pairs of slippers and a bag. I have a front loader, so I hand washed them all, got the excess dye out of all the red things, rinsed till clear, made a pathetic effort in squeezing out the excess water = put them all in the bucket and chucked them all into the dryer on super hot. Which was ok because they had just come out of a hot/cold/hot/cold hand wash cycle. I checked on them every couple of minutes, redunked the hat, took out the bag, and they them all another bash around the dryer, took the socks out then it had another 5 mins to really shrink down.

I thought the brim felted in an interesting pattern, the EONs were in line on the same needle. I really like the result, much better than garter stitch, which makes also makes a thicker piece where you need it but always looks - lumpy, doesn't it.

Slip Stitch Stocking Stitch Hem Edge

After I did the slip stitch socks, I was surprised to see it at our knitting club meeting last June.

We are going through one of the older no-longer-knitting ladies' sample book. It's a lovely collection of samples. Margaret was "picked" (we all duck under the chair when asked "who's going to show us something from the book next month") and she chose this one:

Knit your band however you like, WY, ravel cord, ewrap, whatever, and knit half the band. Bring EON out to hold, set your machine to either PART; Russel levers | side levers forward; ***BX (but I'd do that on the back bed and drop the FB for the next part, but that's me). knit one row.
Return setting to what they were before.
Knit three rows.
Pick up loops (every 2nd needle has a loop)
knit second half of the band.
Pick up stitches from beginning and join in your usual manner.

I liked this so much I decided to do some experimenting.

Edit: ***
or you could bring them up on the back bed, GX/N the next three rows and transfer them to the FB. But really the Passap do such a lovely cast on anyway, I wouldn't bother.

Saturday, July 2, 2011

Loz's Slip Stitch Heel Flap Socks


Loz likes the heel flap socks like she hand knits and
was asking can she make them on her KX35o.

So, my bright idea for Lauren's socks are done. I thought. And this is what I came up with.

They could be made on any single bed machine - just adjust stitch count and rows.

The cast on numbers are 20-24, depending on how wide the sock. I did this pair on T4, however, I think T3, 3.1 would be better. A tighter knit is usually preferred. However the thicker socks? Best experiment and see what is preferred.

So.. Cast on and/or not do your cuff of choice. Maybe your cuff of choice is to pick up the stitches and knit the ribbing? Maybe drop back and latch up? Or mock rib? Hung hem? Pick one.

then roughly 30-40 rows to heel

RC000. Set the KX35o to Partial knitting on the left side (flip the side lever up). Do that on the SK860, but also flip the dial to Slip. (Apparently Punchcard No. 1 does it automatically - Doesn't help if you have neither of these machine, but if making these on a standard punchcard? Good, go for it).

Ok back to doing the slip stitch heel flap.

Starting on L10, bring EON up to hold (so only they knit) PLUS THE NEEDLE ON THE OTHER END.
Knit 2 rows.

Now starting on R10 bring up EON PLUS THE OTHER END NEEDLE.
Knit 2 rows.

Repeat these four rows for (say) 22 rows. (Always - BOTH ENDS NEEDLES WILL KNIT)

Turning the heel:

This bit is surprising tricky.

Identify one third of the needles in the centre.
It is MUCH easier if the end numbers are divisible by 2....
for 20 sts: 6/8/6
or 22 sts: 8/6/8 or 6/10/6
or 24 sts: 8/8/8.

Now what you are doing is knitting xxx stitches, k2tog, k1, turn. Sl 1, p xxx sts, p2tog, p1 turn - repeating until all stitches are knitted.

Starting with carriage on the right, identify your centre, and with your two prong tool, pick up the two stitches next to it and move them over 1 needle. (the handknitting equivalent of K2tog, K1.)
Either put the remaining needles on the left in hold, or slip them onto bobby pins etc.

Knit one row, bring the needle closest to the carriage out to hold. pick up the 2 stitches on the right and move them over one needle and remove the other stitches (exactly as you have done on the left). knit one row.

Now do this all the for the next couple of rows until all the stitches are back in work:

On the carriage side: bring the last needle knitted out to hold
on the opposite side: bring one new needle up into WP, put the first stitch hanging on the bobby pin onto the needle that was on hold last row and the second stitch onto the new needle.
(what you are doing is: Slip one, knit to last stitch held, knit it plus the next stitch together, knit 1, turn)

Picking up the stitches from the side of the heel flap. 22 rows = 11 sts to be picked up.
I tried picking up the bar - but on the thick yarn, the bump is better. However - after the first one, it's very, very difficult to prize the little blighter loose, so I ran a thin needle up them all and they went on beautifully.

Knit one row.

Do the same to the other side. It is a very big stretch, I made it almost to the end, but slipped a couple of bobby pins onto them, knit one row, then slipped them on and hand knitted them.
knit two rows very quickly - before it gets time to get cranky.

Now, doing the gusset. Fully fashioned is the norm.

Each end. Pick up needle 3, put on top of needle two and move both over one needle and return the end needles to RP.

Knit 2 rows.

Continue until you are back to your original stitch count.

This is a bit of a guess - do xx rows to your toe. Somewhere between 40-50 depending on length of foot and how many rows done in the toe.

But before you do them, identify the correct bar to collect on the way back by putting a marker - bobby pin, paperclip, scrap of yarn on the bar before you start your toes.

Short row toes:
If you have round shaped toes, then do short rows until 10 sts, about half the stitches remain.
If you have more pointed toes, then do short rows until 6 or 8 sts, roughly a third of the stitches remain.

Using the Sew-As-You-Go technique, continue knitting until you are at your cuff stage and match what you did when you began.

I've done step-by-step instructions into a PDF for her. I've popped it on Ravelry download, there are a lot more photos describing the technique.

Download Pattern


Tuesday, June 28, 2011

Loz Socks


I've been experimenting with heel flap style single bed socks for my daughter's KX350. Some call it slip stitch heel flap in machine knitting circles, or so I've been told.

You see... I had an idea. I've written it up for her to try...

If I've explained it properly, I'll finish it off and put up the PDF on Ravelry.

Monday, June 13, 2011

Wildhoney's Machine Knit Shawl "Kate"

Over on Ravely, we asked wildhoney - aka Natalia, how she made her Shawl "Kate", she was kind enough to write it out in English for us, which is excellent, our Russian isn't very good. This is what she wrote:

_________________________________________________________

I’m sorry, my language is not very well.
You asked about the shawl? there are shot rows, they make a half of the circle. There are 8 wedges (or triangles) and a ruffle.

I’ll try to describe…

Cast on 200 st and make 2 rows. Turn on a shot-rows mode on a carriage, (1)put forward in position D 3 st. Repeat from (1) every 2nd row till 4st in work. Turn off the shot-rows mode and make 2 rows. = it is 1 triangle. Repeat it 8 times (or more, if your gauge is different)

The ruffle: cast on 20st. and make 10 rows by some different thread and 1 row of main thread (the carriage is on right side). put the edge st of the shawl on the last left needle (there two sts on needle now, ruffle has 20 sts always! do not increase!), make 1 row and move the carriage on right. (4) Do 20 rows (10 edge sts in work) and make a triangle: (2)Turn on a shot-rows mode on a carriage.
put forward in position D 2 (or 4) sts. on left. Repeat from (2) every 2nd row till 4st in work (on right side). (3)Push 2st in position B. Repeat from (3) every 2nd row. Turn off the shot-rows mode and work like from (4)

Hope, I’m not too silly to explain :) If you have questions, I’ll try to answer with pleasure.

This pattern is based on the pattern by Olga Igumnova and ruffles are by Anna (Annabox from Osinka.ru)

_________________________________________

Some of our newer knitters wanted a more detailed instructions, and here it is for them:

The Shawl:

Cast on 200 sts (Natalia says she used 410g of yarn) with waste yarn.

Knit 2 rows

(1) Set machine to Hold for short rows.

** put 3 needles into HP (bring them all the way out), knit 2 rows** (either wrap needle or make an eyelet, choose whichever you like best - Diana Sullivan's sock youtube tutorial describes this very well - move the marker to about the 6 minute mark - but we are only doing short rows on one side, so we make a nice wedge)

Repeat from ** to ** until 4 sts remain.

Take machine off Hold, knit 2 rows. (2)

This sequence makes one triangle. Repeat from (1) to (2) at least 8 more times, depending on the thickness of the yarn.

The Ruffle:

Cast on 20 sts on waste yarn and knit about 10 rows. Change to main yarn. Carriage on Right (COR)

Put the edge of the shawl on the last needle (using Sew As You Go Technique - link to Diana Sullivan's youtube lesson - which explains this very well). There will be two stitches on this needle, the last needle's stitch and the first loop on the shawl. DO NOT INCREASE STITCH COUNT.

(3) *Knit 2 rows, put a bar from the edge of the shawl onto the last needle*

Repeat from * to * 10 times (20 rows and 10 edge stitches have been made)

Set machine to Hold for short rows.

++put 2 or 4 needles into HP on left, knit 2 rows ++ Repeat from ++ to ++ until 4 sts remain.

+ push 2 or 4 needles into UWP (Upper working position - take care not to push them in too far, about 2cm or 3/4" of needle hanging past the gatepegs is about right), knit 2 rows +. Repeat from + to + until all needles are in WP. (4) (choosing 2 sts will produce a lot of ruffle!)

Repeat from (3) to (4), but omit one set of knit 2 rows—so only 2 rows are knitted between sets not 4. Always 2 rows between actions - either putting on the edging or doing the short rows.

Finish and embellish as you refer. Choosing a beautiful yarn is probably the best thing to do for the first one before fiddling with beads etc.

___________________________________________

There you are girls, I hope you can follow the instructions.

Sunday, June 5, 2011

Machine Dutch Heel


Sandy, on Ravelry, found a delightful pattern for machine knit Dutch heel socks. Well, you know me and socks - had to try them out, didn't I?


Very interesting construction. I really liked how they turned out. I haven't worn them yet, but the day is still young. I may just need to wear them today.


I followed the instructions as written, on the Passap, I've put all the std gauge machines away, so dropped the front bed and worked the rows on Miss Pinky.

I decided to put a little bit of padding to the mini flap rows.

My numbers are:
C/O72, T3.5, 2.2 IR ribbing 16R
T4.75, CX/CX 170R
*GX/BX 1.1, right arrow, 1 row, end pushers WP.
GX/N 1 row, bring outside pushers to WP*
Repeat * to * for 24 R
GX/N, Heel divide: 11/14/11 (follow original instructions) RC000
CX/CX T4.75 30R NO reset, change to T4.5, to 150R
Toes - Dec 1 sts all four edges on RC 150, 158, 164, 17o, 174, 178, 182, 186 then ev round till 8 sts remain.

Sock Day at Epping

I ran a sock day at Epping for NSW Machknit. It was a hands on type of day. Lots of machines for people to try out the different techniques.

Kris Basta from kriskrafter.com gave permission for us to use her felted slippers pattern and Cathie Sanders from northtipton.com have permission for us to use Gerta Sitt's machine Dutch Heel.

A big thank you to both ladies for allowing me to include the patterns in our hand out notes.

Sunday, May 1, 2011

Hallo Sweetie

"Hallo Sweetie!" says River Song, just as kitty walked past.

Kitty rushes up to television and says "hallo" right back.

Then rushes over to me and says "hallo"... soooo pleased with herself...

I give her lots of pats as she purrs her silly head off and told her yes, the tele did say hallo to her, and didn't shatter her happiness, I just kept watching the Dr Who rerun of last season's finale...

Never a dull moment around here....

Tuesday, March 8, 2011

Lace Carriage Notes


I've made some notes for me for the lace carriage, with pictures.

Kitty, as always, is right on hand to help.

Dont move the needles beyond the needle bed.
Use ravel cord to hold stitches, (this works really well).
Take time to do it right.

Use the lace carriage to do the stocking stitch.
Yarn in the feeder, side levers forward and no punchard.

It knits at a looser stitch than the main carriage.


Inserted lace card

To tell the carriage where the pattern goes (starting from the back) :

bring the white lever next to the card forward.
Set the edge pins.
on the carriage flick the side levers forward, and the dial to transfer.

When ready to start, move both levers back and the centre dial down.


Increase and decreases can be done as normal, just move the edge pins to their new position and take the needle out of work (for decreases). All the pins do is stop the carriage from doing anything.


Just do your increase/decrease and move the edge pins. then knit. If there's a needle, it will knit, if not it doesn't, so it doesn't matter where the edge pins are, all they do is stop patterning. Just remember to move them and take the needle out of work.


Also hold new ball under the feeder until it takes up.


Make sure to pass BOTH edge pins AND the drums need to clear the punchcard assembly AND the row counter.


 Sometimes the edgepins moved and jammed under the carriage, push it back.


Causes of jams are, the edgepins becomes dislodged, push it back.


Sunday, February 13, 2011

No Chat Day

I've been having no chat, just knit days on Ravelry to get a good run on some challenging projects. I think I spend too much time chatting and not enough time knitting, doing housework, sewing, reading etc.

I'm learning to use the Silver Reed machines this year and decided to rework the Apres Surf Hoodie, from the Summer 08 Interweave Knits mag, using Lace Card 10, rather than hand manipulate all the lace. I wasn't really interested in duplicating the lace as written, rather enough to do working the darn machine. It's the little things I've decided, something so simple as working the prong tools, totally different technique, I kept jamming them.


Another wonderful thing is I managed to do the decreases before the lace with the garter bar. Now for the problem. My darling cat used to be a wild thing. She decided that the garter bar box was dangerous, not to be trusted and spent an anxious hour working up enough courage to sniff it. Then decided to sit on me, then lay next to me, just in case it turned evil.

It reminded me of when she was new, and plastic bags were the most scary things. I decided to well and truly kill them for her. threw them on the ground and jumped up and down on them till she was happy they were no longer a threat. So we don't mind them now, even attacks her own paper bags now - all by herself. She has her ways...

Now back to my back - I. Have. Finished. It. And on the way, I've learnt -
to do fashion lace with the punchcard,
how to increase and decrease,
use the garter bar to do decreases over the work.
do a better roll hem
undo four rows without messing up where I was on the punch card
Remember to take out the yarn and put it back in

Phew: Ta Da:

Wednesday, January 26, 2011

Finished my Spiral Jumper

I've finished it and here it is. Phyllo Yoke Sweater from the Knitting Nature book.


It worked out very well. The only odd thing was the chart instructions. Of course every second round is knitted, but nowhere did it actually say to do that. Plenty of blather about seashells. I think less seashells and more attention to correctly writing out the instructions would be better all round. Never mind, here is a closer look as the yoke:

I like how the KX350, with the wobbly tension mast, makes the stocking stitch sections a little bit uneven, just enough to add a nice look to it. Very pleased. I'm sure when the weather cools down it will be my fav jumper.

Monday, January 17, 2011

A Book, a Bag, a Machine and an Afternoon

This is what an afternoon spent knitting at a machine looks like. The book "Knitting Nature", which has the Phyllo Yoked Jumper I'm making, an empty bag of Paton's Washed Haze, a Brother KX350 and an afternoon of getting stuck into it. Working on projects is not a pretty activity, there's mess - tools, workbook, cleaning cloth, weights, end of balls dangling, empty ball bands, waste yarn strewn where it landed. So here is a photo of the end of the day's work. It's not a pretty picture, but I decided work never is.

By the time I got to the 14th ball, I had made the front, back and sleeves, all up to the armhole ready for me to hand knit the yoke.

I changed the pattern a little bit, I did a rolled hem, first one ever, put in a couple of stitches waist shaping and short rows not 2tog on the neckline.

T6 gave 19S/26R = 10cm, which closely matches 4.5mm wood knitpics circs.

Now it's on it's way, I'm up to the first row of the chart.

....And I have tidied up! I've finished the projects I'd lined up for the KX350.